基于Consul+upsync构建动态Nginx配置系统
前言
本文介绍如何利用Consul+upsync来实现动态的管理Nginx后端服务器,实现动态增删后端服务器而无需reload Nginx服务。
环境说明
| IP | os | role | remark |
|---|---|---|---|
| 192.168.200.101 | CentOS 7.4 | nginx-lb and consul | |
| 192.168.200.102 | CentOS 7.4 | nginx-server | |
| 192.168.200.103 | CentOS 7.4 | nginx-server |
1 | # cat /etc/redhat-release |
Nginx-Server安装
1 | # yum install -y pcre-devel openssl-devel |
Nginx-LB配置
Nginx部署
1 | # yum install -y pcre-devel openssl-devel |
nginx-upsync-module及nginx_upstream_check_module模块配置
upsync是微博开源的基于nginx的动态流量管理方案. github地址: https://github.com/weibocom/nginx-upsync-module.
nginx-upsync-module,它的功能是拉取consul的后端server的列表,并更新Nginx的路由信息。此模块不依赖于任何第三方模块。 consul作为Nginx的db,利用consul的KV服务,每个Nginx work进程独立的去拉取各个upstream 的配置,并更新各自的路由。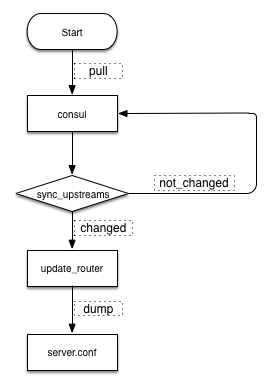
模块相关信息可以参考GitHub文档信息:https://github.com/weibocom/nginx-upsync-module/tree/master/doc
1 | cd /data0/src |
Consul配置
1 | cd /data0/src/ |
调整Nginx配置并测试
1 | # cat /etc/nginx/nginx.conf |
创建upsync_dump_path
1 | mkdir -p /etc/nginx/server/ |
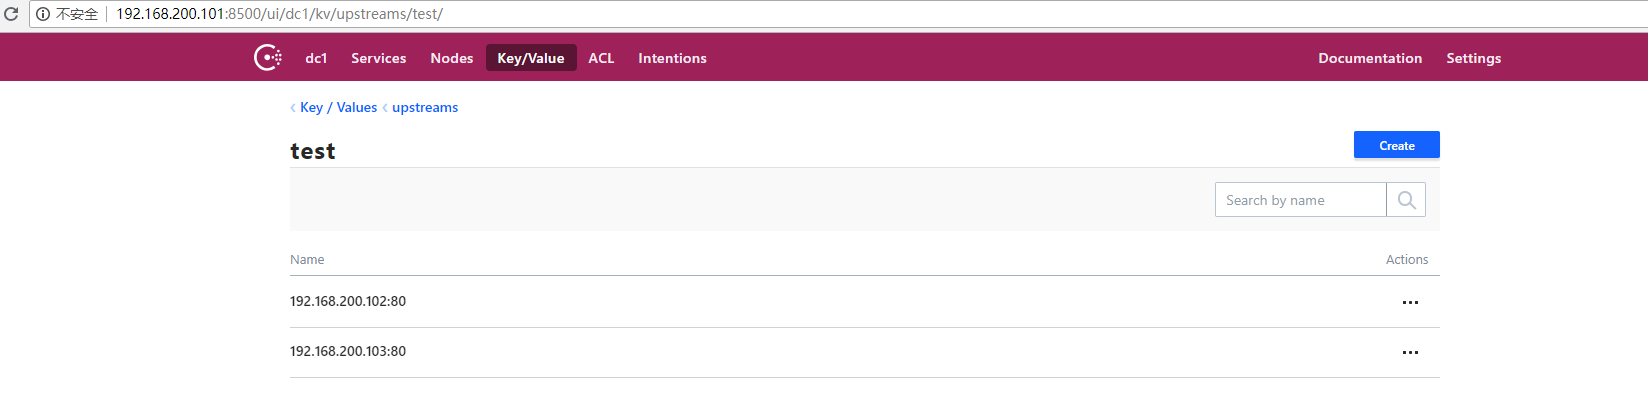
添加后端
1 | curl -X PUT http://192.168.200.101:8500/v1/kv/upstreams/test/192.168.200.102:80 |
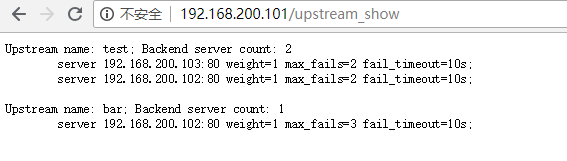
查看通过consul添加的后端服务器信息
1 | # cat /etc/nginx/server/server.conf |
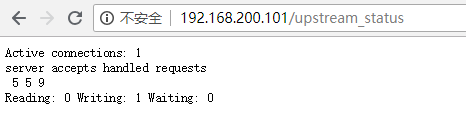
验证nginx代理信息
1 | # for i in `seq 100` ;do curl -s -I http://192.168.200.101|tail -2|head -1;done |
real地址就是后端服务器的地址
删除后端
1 | curl -X DELETE http://192.168.200.101:8500/v1/kv/upstreams/test/192.168.200.102:80 |
测试并验证
======================================================
希望各位朋友支持一下
- 领取我的阿里云幸运券,谢谢.
- 使用腾讯云资源
- Linode VPS
- 搬瓦工VPS
- 阿里云1888元云产品通用代金券点我
- 阿里云最新活动全民云计算升级-拼团上云更优惠
本文作者:dongsheng
本文地址: https://mds1455975151.github.io/archives/c92739f9.html
版权声明:转载请注明出处!